I’m not only a computer geek, I also spend considerable time renovating our home. Doing things yourself means there’s plenty of opportunities to make geek-friendly adaptions, such as preparing for a good home network.
Renovating a house is a major strain for the family economy, so keeping an eye on the cost has been a priority. I’m also a bit reluctant to invest too much in today’s state of the art technology, only to find out I need something else in just a few years. Considering that we’ve had the house for nearly 10 years things have indeed changed. Back then wired networking for computers was the main concern – now it is proper wifi coverage for all the phones and tablets that didn’t even exist back then.
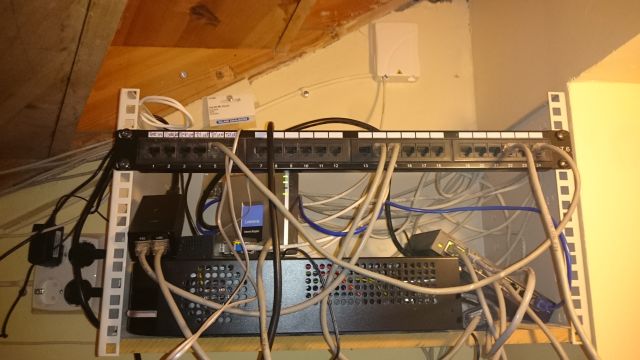
 My take on a future proof investment is to install a lot of empty cable hose. Then I’ve pulled CAT-5e cables to those places where I actually need it. Everything converges in the cupboard under the stairs (no, it’s not used as someone’s bedroom) where I have a small 19″ rack. In the rack, I have my home server (more about it below) and the central switch. The white box on the wall above the patch panel is the incoming fiber.
Installing Hoses
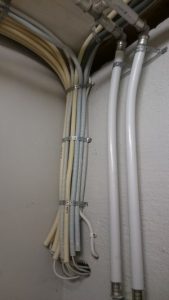
 The theoretical network model starting with a physical layer gets very relevant when it comes down to installing it yourself. Most of the cable hoses arrive from the main living area upstairs through the ceiling of the storage room that’s next to the cupboard. I just hate visible cabling in inhabited rooms so I’ve put considerable effort into handling the cabling in spaces where looks doesn’t matter. I’ve mostly used standard 16mm cable hoses, as those are readily available (at least in Sweden where they’re used for electrical wiring). A 16mm cable hose can easily fit a single CAT-5e cable. For short distances where the hose is straight with only a single large radius bend, it’s also possible to pull two single CAT-5e cables through. When installing the hoses it’s important to keep any bend with rather large radius to ensure that pulling cable through will work. I prefer the type of hose that’s approved for use in concrete floors – they are more stiff and can’t be bent too much. It’s also important to fixate the hoses properly. A hose that moves too much is nearly impossible to pull a cable through. I’ve also utilised possibilities to use blind spaces as hidden hubs for the hoses, such as in the kitchen.
Skirtings with Cable Space

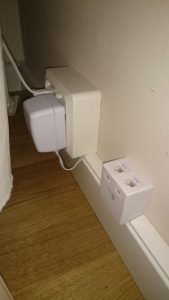 As good as the hoses are in non-visible places, they’re not an option in normal rooms. When retrofitting a network into an existing house something more is needed – so I was extremely happy when i found skirtings that have a hidden space for cabling. That means I only have to get a hose to somewhere along the wall and make sure the end of the hose is inside the skirting’s cable space. With the lid back on and a network socket fitted I think it looks rather nice. The model I’ve used comes with an internal separator that actually allows both electricity (if installed by a certified electrician) and network cable to be delivered together. The photo to the right is from a room that was intended to be used as an office, before kid number three turned up and occupied it. That’s why there’s both a four way power socket and the dual ethernet connector. The little guy probably has the best connected kid’s rom ever (there’s more power sockets and network connections on the opposite wall).
Installing Cabling

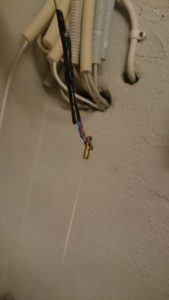 With hosing and skirtings in place, it’s time to look at cable installation. To get a cable through a hose, a fish line is used. To the left I’ve just pushed it through a tube from the master bedroom ending in the attic. From there I pulled the cable across the attic, to a hose leading to the cupboard under the stairs. To the right, is the other end of the fish line with the network cable attached after pulling all the way through. I’ve used two pairs from the cable and pulled them through the loop at the end of the fish line, and then turned them back and twisted them to keep them in place. The tape is extremely important – it prevents the ends of the twisted wires to turn into a grappling hook if the cable has to be pulled back, out of the hose.
When we got the fiber installed a few months ago the installation firm was first not very happy about me wanting the fiber to a cupboard in the ground floor in the absolutely center of the hose. That was until I showed them the the empty hoses from the attic. The installation turned out to be one of the quickest they had done.
Network Equipment
With the physical cabling in place, it’s time to look at the network equipment. I’ve moved away from the crappy consumer grade wifi all-in-one routers. Instead I’m using a linux server as router/firewall. Having worked with proper firewall equipment previously (Cisco PIX and Linux based IpTables) there’s simply no way I feel comfortable in a simple point and click GUI hiding the details. I want a proper rule set where I can see exactly what happens. That is what I get from a linux box running iptables, bind and dhcpd. Everything is connected through a NetGear switch featuring VLAN support. That way I can segment my network and have a single switch where different ports belong to different logical networks. I have three logical networks: the outside Internet connection, the private inside and a guest network. The latter only get internet access and cannot reach the file and print sharing services on the private inside network. With consumer grade equipment that kind of separation is hard to make. Using a linux server as the firewall also means that I can expose services on it directly on the internet, without messing with port forwarding. The number of services visible is extremely limited, but I can access it from the outside if needed. It is also setup to take weekly backup of this blog so that all the effort I’ve put into it is not only in the hands of the hosting provider.
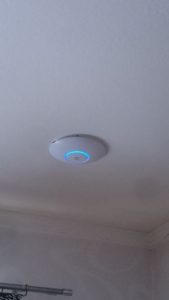 Then there’s the wifi part. Consumer grade wifi generally sucks and the equipment looks terrible which means it cannot be installed in any visible place. I’ve used a Unifi access point for several years and recently added another access point to get better coverage. This is a Unifi AC Lite Access Point in the living room ceiling. The cabling is done through the attic. Thanks to the power over ethernet feature, there’s no need to get electrical wiring anywhere close to it. It is fed from a power socket next to the rack in the cupboard under the stairs. Another great thing with the Unifi APs is the VLAN support. That’s how I handle the guest network. It’s simply a separate SSID that binds to the guest VLAN. It supports a captive portal and stuff, but I didn’t bother using that and instead just have an easy to remember password on the guest SSID. Having multiple access points really improved coverage, but also meant some issues with the Google (Chrome) Cast device we have. It turned out that it relies on multicast traffic spilling over to all over the network. That was blocked by the IGMP Snooping feature of my switch. With IGMP snooping enabled streaming started to work regardless of what AP the phone/computer is connected to.
Is it worth it?
Doing all this work certainly makes it for a better working digital life. As good as wifi has gotten, there’s still nothing that beats a wired Gbps connection for working with large files on a server. When doing photo work handling raw files from my Canon EOS, the wifi simply is too slow. So I’d say it’s worth it and I even think my wife agrees. Then there’s the geek pride to have my own 19″ rack, which is of course also an important thing to consider.
