Distribution of credentials to new users of a system is often done in an insecure way, with passwords being sent over unsecure e-mail. With ASP.NET Identity, the password recovery functionality can be used to create a secure account activation mechanism.
The scenario for ASP.NET Identity, in the default MVC template is to let users self register. Then there are mechanisms to confirm the e-mail address, to make sure that the user actually is in control of the given e-mail address. There are also support for letting the user associate the account with external sign on solutions such as Google, Facebook and Twitter. That’s perfectly fine, but not for most applications I build.
I’m building line of business applications. They are actually often exposed on the Internet as they need to be available for partners. But, they are not meant to be available through self registration for anyone on the Internet. Those applications are invite only. That means that a user account is created for a new user. Then that user somehow has to be notified that the account has been created. The usual way to do that is to create the account, set a good password like “ChangeMe123” and send the user a mail with the new credentials. There are two problems with this
- A lot of users don’t get the hint and keep the “ChangeMe123” password.
- The e-mail can be sitting unread for a long time in the inbox, until someone gets hold of it – and the account.
Fortunately, there is a much more secure way to do account activation with ASP.NET Identity without much coding at all – by reusing the password recovery mechanism.
Password Recovery in ASP.NET Identity
To recover a password in ASP.NET Identity a password recovery token is used. It is a one time secret, that can be used to reset the password. It has a built in expiry mechanims that is set to 24 hours by default. I think the password recovery mechanism is quite good and follows best practice.
The code required for password recovery is present in the default template, but it is commented out. To get it running, the provided empty e-mail service must first be activated. It is located in IdentityConfig.cs and looks like this.
public class EmailService : IIdentityMessageService { public Task SendAsync(IdentityMessage message) { // Plug in your email service here to send an email. return Task.FromResult(0); } } |
To make the EmailService actually send e-mails, a few lines of code are needed.
public async Task SendAsync(IdentityMessage message) { using (var client = new SmtpClient()) using (var mailMessage = new MailMessage()) { mailMessage.Body = message.Body; mailMessage.To.Add(message.Destination); mailMessage.Subject = message.Subject; mailMessage.IsBodyHtml = true; await client.SendMailAsync(mailMessage); } } |
I’ve used the built in SmtpClient to send the mails. I don’t understand why that code can’t be in the default template. I’ve also added the necessary config lines to my web.config.
<system.net> <mailSettings> <smtp deliveryMethod="SpecifiedPickupDirectory" from="noreply@example.com"> <specifiedPickupDirectory pickupDirectoryLocation="c:\temp"/> </smtp> </mailSettings> </system.net> |
To activate the password recovery, confirmation of the e-mail address on registration has to be activated by activating the commented out lines in AccountController.Register(RegisterViewModel) and in AccountController.ForgotPassword(ForgotPasswordViewModel).
Once the password recovery is working, it can be reused for account activation. In fact, it is very much the same scenario: A legitimate user, that has access to their mail should be let in to the system without knowing the password. Let’s (ab)use the password recovery to build a secure account activation system.
Implementing the Secure Account Activation
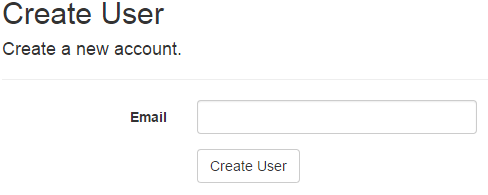 Instead of the user registration form, we need a user creation form that allows an administrator to add a user. It’s a simple form with just one field, for the user’s e-mail address.
When posted, the account should be created and an activation mail sent. The functionality is quite similar to the one in the existing registration form with a user being created. But instead of sending a mail to confirm the email address, we’re sending an activation mail to the user. I’ve also set the EmailConfirmed to true right from the start, to make it possible for the user to request a new activation/password reset token in case the first one expires.
[HttpPost] public async Task<ActionResult> Create(CreateUserModel model) { if(ModelState.IsValid) { var user = new ApplicationUser { UserName = model.Email, Email = model.Email, EmailConfirmed = true }; var result = await UserManager.CreateAsync(user); // Create without password. if(result.Succeeded) { await SendActivationMail(user); return RedirectToAction("CreateConfirmation"); } foreach(var error in result.Errors) { ModelState.AddModelError("", error); } } return View(model); } private async Task SendActivationMail(ApplicationUser user) { string code = await UserManager.GeneratePasswordResetTokenAsync(user.Id); // Using protocol param will force creation of an absolut url. We // don't want to send a relative URL by e-mail. var callbackUrl = Url.Action( "ResetPassword", "Account", new { userId = user.Id, code = code}, protocol: Request.Url.Scheme); string body = @"<h4>Welcome to my system!</h4> <p>To get started, please <a href=""" + callbackUrl + @""">activate</a> your account.</p> <p>The account must be activated within 24 hours from receving this mail.</p>"; await UserManager.SendEmailAsync(user.Id, "Welcome to my system!", body); } |
That’s all that’s needed. The administrator can create a user, without ever having to bother with a password. The user gets an automatic welcome mail, which has a secure expiry of 24 hours.
But there’s one more thing that I prefer to add, to make the activation process a bit more user friendly.
Automatic Sign In After Activation
One thing that I always find frustrating with password recovery mechanisms is when they immediately force me to sign in with the new password. I can’t understand why that is necessary. I’ve just proved my identity through the e-mailed token and I’ve just entered a new password. Just let me in.
To fix this in the default MVC template, one line is needed in the AccountController.ResetPassword(ResetPasswordViewModel) method.
[HttpPost] [AllowAnonymous] [ValidateAntiForgeryToken] public async Task<ActionResult> ResetPassword(ResetPasswordViewModel model) { if (!ModelState.IsValid) { return View(model); } var user = await UserManager.FindByNameAsync(model.Email); if (user == null) { // Don't reveal that the user does not exist return RedirectToAction("ResetPasswordConfirmation", "Account"); } var result = await UserManager.ResetPasswordAsync(user.Id, model.Code, model.Password); if (result.Succeeded) { // Automatic sign in after password has been reset. SignInManager.SignIn(user, false, false); return RedirectToAction("ResetPasswordConfirmation", "Account"); } AddErrors(result); return View(); } |
It is also a good idea to adjust the message shown in ResetPasswordConfirmation.cshtml to indicate that the user is now signed on.
That’s all for now. We have a working, secure account activation solution, built on the password recovery functionality. To make things a bit more user friendly, a separate action can be used for the account activation, showing a better user welcome screen. In my opinion there’s actually quite a lot of room for improving both the user interface and the e-mail messages sent by the default template. But that’s okay for me – the template is a template – not something that is meant to be a complete, working solution out of the box.
A complete working project with the solution described in the post is available on my GitHub Account.
One benefit of having users log in through the ordinary log in page right after account creation is that users have the ability to save the password in the browser autocomplete system before they forget it.
This is however less of an issue with the password reset.
This is also less of an issue with later versions of Chrome that seems to be able to recognize change password pages and update the stored password from there too.
I’ve done a similar thing recently.
You can simply create the user without the password and send the mail, keeping
the confirmation step intact.
Then the user insert the password when he complete the registration.
To me this is a better approach.
That looks better, as you won’t have to set the e-mail as confirmed until it really is. But it will also prevent the user from issuing another token in case the original one is lost. I assume that means that you will have a custom form for the email confirmation that allows you to set the password?
Does the email confirmation token also expire after a set lifetime? If not, that is a difference between the two solutions, which somewhat lowers the security. Nevertheless – the solution is definitely better than mailing the real password in plain text.
Yes, I have a custom form for the email confirmation where the user set the password and other data if needed.
Yes, the token has an expiration date.
In my case is the admin that manage the creation of users, and I think in your scenario too, so he knows if a user has completed the registration and if the token has expired so he can resend it.
Alternatively you can let a user with a expired token to request another, the email confirmation step remains valid, if he doesn’t own the email address he doesn’t get it.
Thanks for the help! Everything working as expected.
I created my callbackUrl using a normal string concat, because I am using web forms. One thing I had to add was manually Url encoding the code (it was giving issues with the plus character):
Thank you for this post!
You’re using ResetPasswordToken to invite users. In current implementation of my app I do the same (the only difference is that I’ve custom class for ResetPasswordToken inherited from DataProtectorTokenProvider with custom options class inherited from DataProtectionTokenProviderOptions so I can change ResetToken LifeSpan).
But what if I want to use my custom token provider for password reset feature (with 30 min lifespan) and another with different lifespan for user invite (with lifespan 1-2 days)?
As far as I understand – Identity only allows to configure 1 token provider for reset and 1 for email confirm.
I’m using asp net core.